
Listing a rentable asset
What it looks like for a lister
Like explained previously, listing can be done via the IQ Market. Here’s what it looks like for a lister:
- Prerequisites:
- the lister has to own an Original Asset, a small amount of gas (see testnet faucets here), and Metamask set up;
- the IQVerse has to have a Warper prepared for the corresponding Original Collection;
- either the IQVerse has to be whitelisted or the lister has to have a link to the IQVerse page.
-
The first step depends on whether the IQVerse is whitelisted. If it is, the lister can visit any page of the IQ Market, otherwise they should follow the link provided by the service (see making a collection rentable).
-
On that page, they should authorize via Metamask (if haven’t done it yet) and hit the “List NFT” button in the top menu:

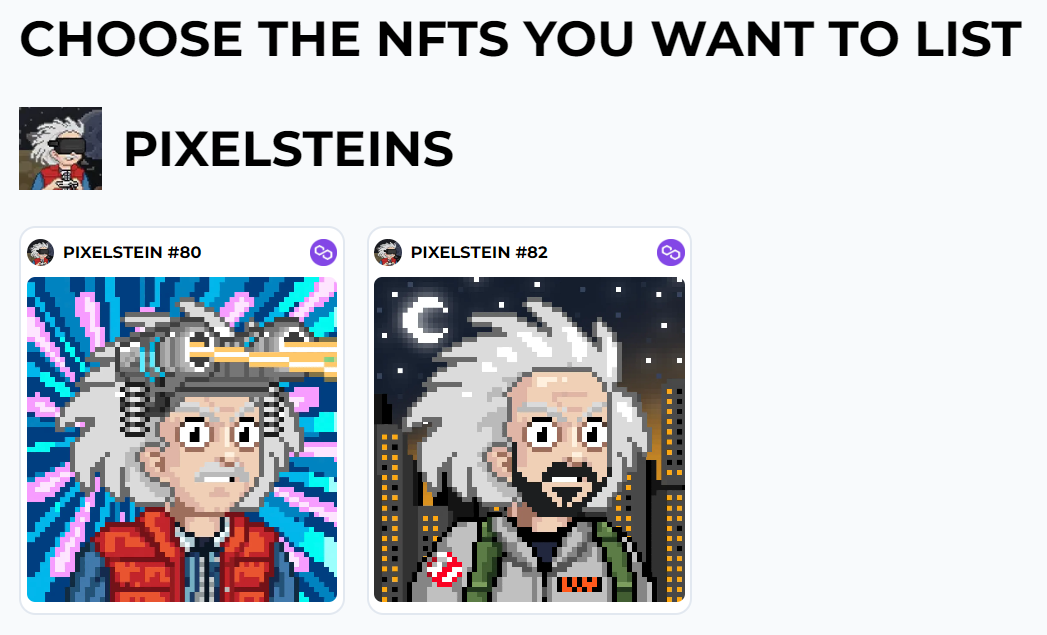
and then choose the Original Asset they want to rent by clicking on its card:
-
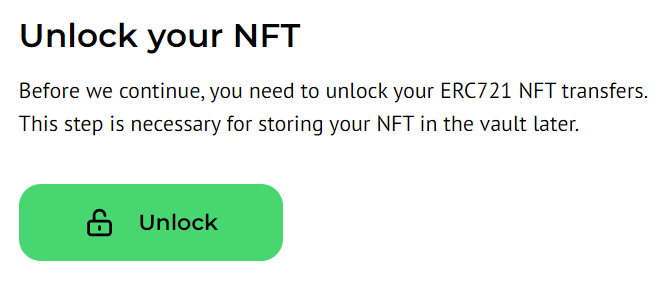
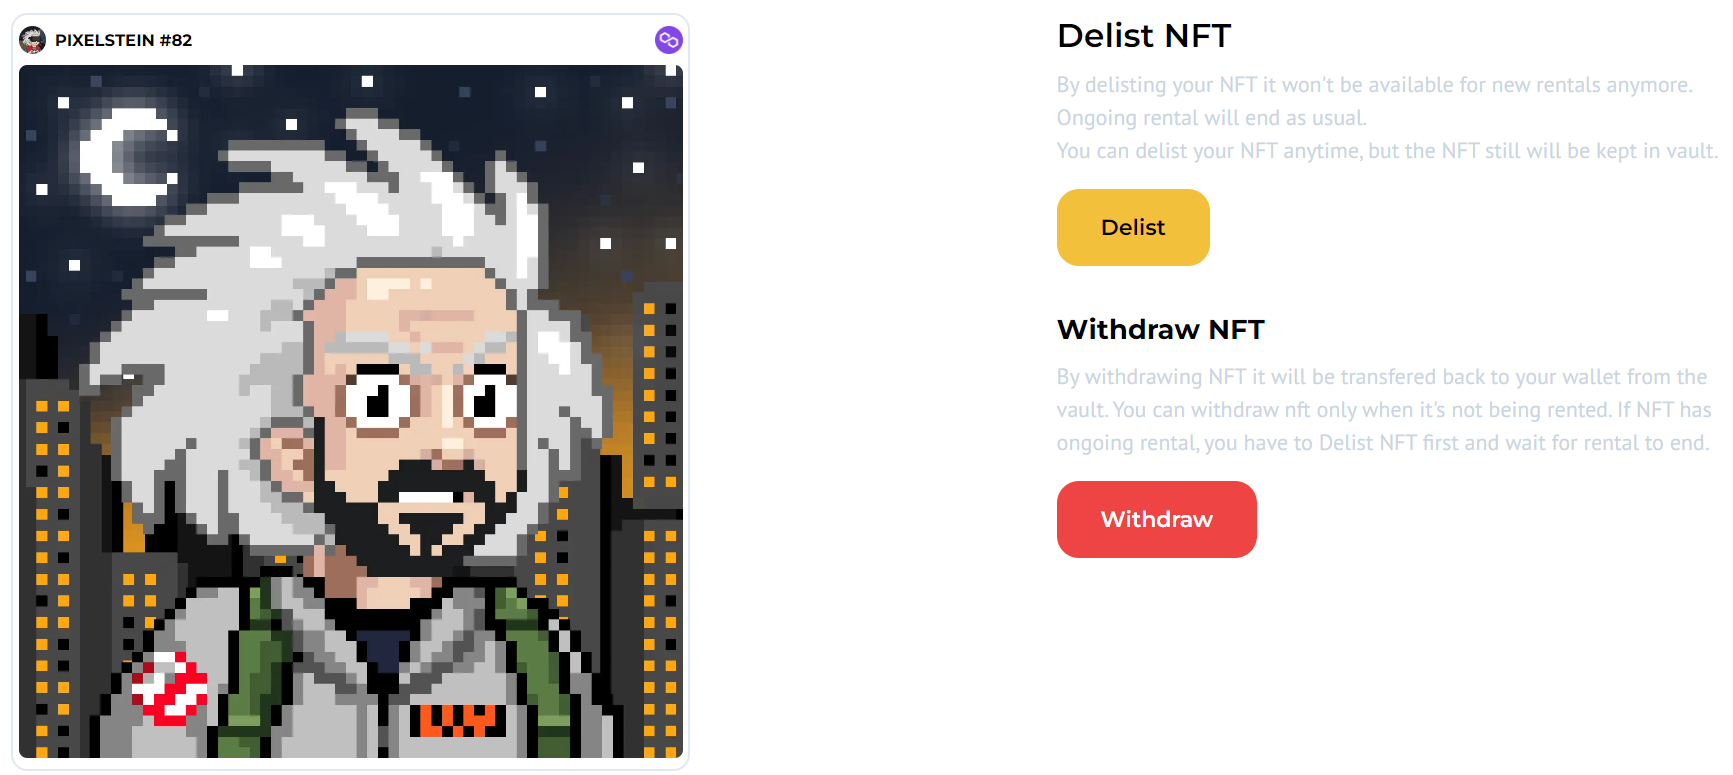
Next, they are prompted to Unlock their asset, which is done via transaction. Unlocking means that the asset is taken over by Protocol to be safely kept for the time of listing (the user is free to delist it at any time and withdraw when there are no active rentals for it).
- After unlocking transaction success, they get the form to fill in the Maximum Return Period (which is also the maximum rental period) and the Lister Fee:
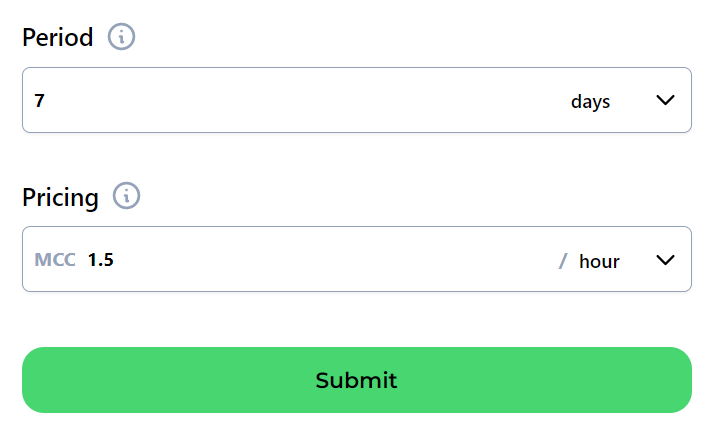
- Any listing remains active until it is paused or the asset is withdrawn/delisted. The Maximum Return Period is only a return guarantee measure for the owner and a limitation for a renter; it has nothing to do with deactivating the listing automatically.
- The fee type (just a fixed price per time unit or something more complex) depends on what the IQVerse supports for this Original Collection. In some IQVerses, they have to choose from several options.
Now the asset can be rented.
For more details about listing, how it works, and what one can do with their listing after creating it, see Listing in more detail.
Updated about 3 years ago